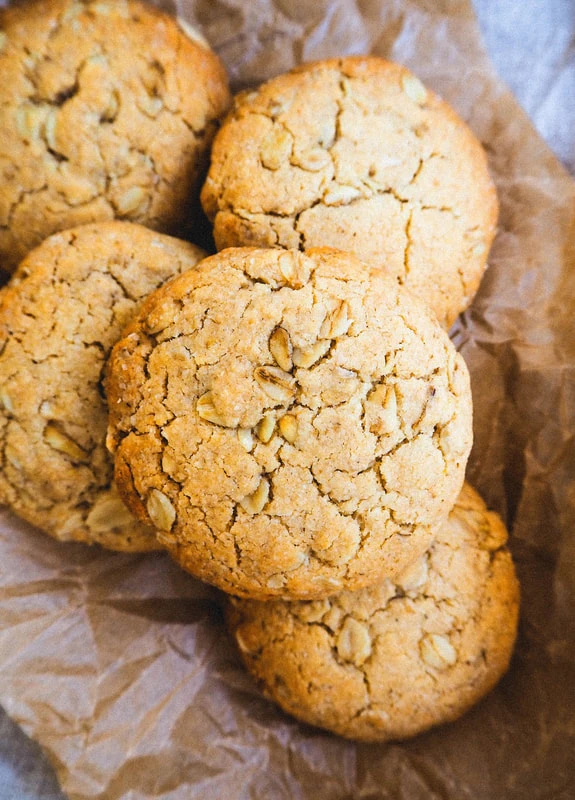
 There are three biscuits I adore - Choc- Chip (obviously), Mint Slice (my weakness - google Arnott's- In Australia there are vegan versions now available) and ANZAC biscuits. What is an ANZAC Biscuit? "Well you're sure in for something!" Firstly ANZAC stands for Australian New Zealand Army Corps and represents the men who fought during WWI. The biscuits were supposedly baked & sent by the men's significant women, as the ingredients when baked didn't spoil; butter, flour, sugar, golden syrup, oats & bicarb soda. However this proved to be untrue, and instead the biscuits were sold to community members to help raise funds for the soldiers. ~ The ANZAC is a rather humble biscuit and in other words, no need for embellishment! The combination of staple ingredients creates a truly wonderful cookie; well balanced and something no-one would complain about eating. As always I've tweaked the recipe to be made using 'whole food' ingredients, with coconut butter substituting the butter and also providing the coconut detail to the biscuit. I discovered this technique of using coconut butter from and her eBook Oh Sweet Vegan. Oat flour is used as the white flour sub as it only seemed natural when oats are the star here. Enjoy! Love Alex, Ballerina Bites. Xx PS: Be sure to tag me at on Instagram so I can see your wonderful recreations! 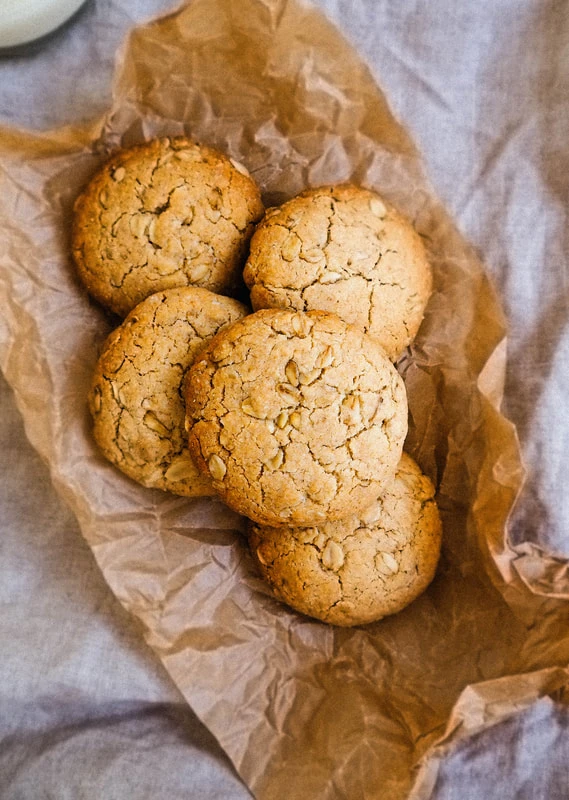 Ingredients ¾ cup (180g) coconut butter* ⅓ cup (115g) brown rice syrup 1 cup (100g) oat flour** ½ cup (50g) rolled oats ½ tsp bicarb soda ¼ tsp salt 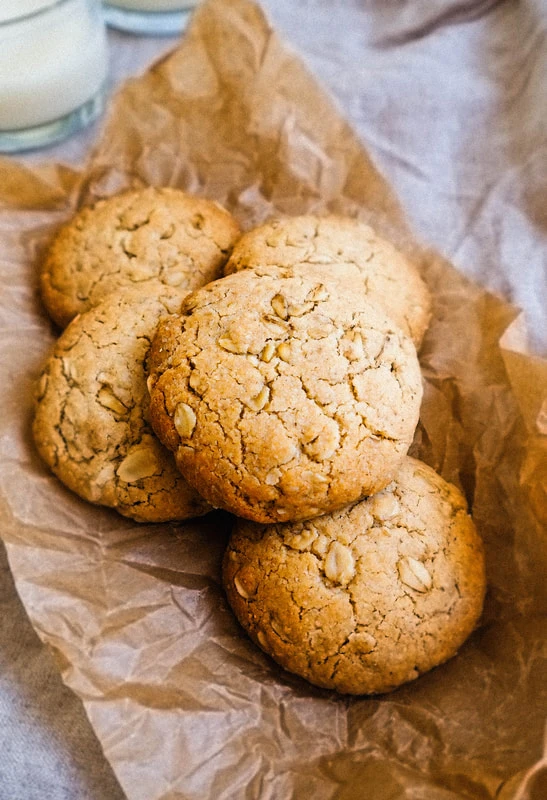 Method
Preheat the oven to 180°c and line a tray with baking paper. In a large bowl add the oat flour, rolled oats, bicarb soda and salt - combine using a whisk. Gently heat the coconut butter & brown rice syrup in a small saucepan on the stove-top. Once it's nicely melted together, pour over the dry ingredients. Using a spatula, mix until it resembles cookie dough. Spoon the dough into a heaping tablespoon - roll into a ball, before flatting and placing on your lined tray. Repeat the process until no dough remains. Bake for 10- 12mins or until golden. Allow to cool for 5mins on the tray, before transferring to a wire rack to cool completely. Store the cookies in an airtight container for up to a week. Yields 10 cookies Notes *See here on how to make your own coconut butter ** To make oat flour, simply blend oats (porridge or rolled) in a NutriBullet or food processor until it resembles a fine meal.
0 Comments
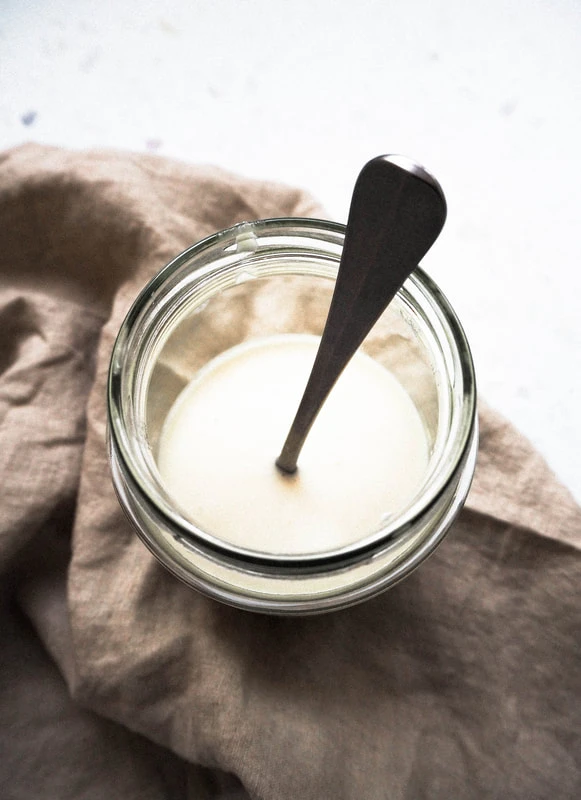 Throw-back to the time I lived in Germany and where I'd purchase coconut butter on the regular. It seems ridiculous to me now, why I'd purchase something that's so easy to recreate at home- not to mention cost effective?! ~ For this recipe you'll need 'one' ingredient - desiccated coconut. You simply blend the coconut until it resembles the consistency of melted chocolate. EASY! Other recipes on the blog also featuring coconut butter include - Berries & Cream Porridge, Matcha Vanilla Cupcakes & ANZAC Biscuits. Although I've only mentioned sweet treats, coconut butter works wonderfully in curries too. Enjoy! Love Alex, Ballerina Bites. Xx PS: Be sure to tag me @ballerina_bites on Instagram so I can see your wonderful recreations! Ingredients
3-4 cups unsweetened desiccated coconut Method In a food processor, add the coconut and begin to blend. Blend until the coconut is super smooth, like nut butter. Stop & scrape down the sides with a spatula throughout the process. Blending should take between 20- 30min. Have a taste midway through to see how the mouth feel is. It may look smooth, but be grainy! Store in an airtight jar - keeping in mind at room temperature the butter will be solid. To use simply melt in the oven. Yields 1x 500ml Jar. 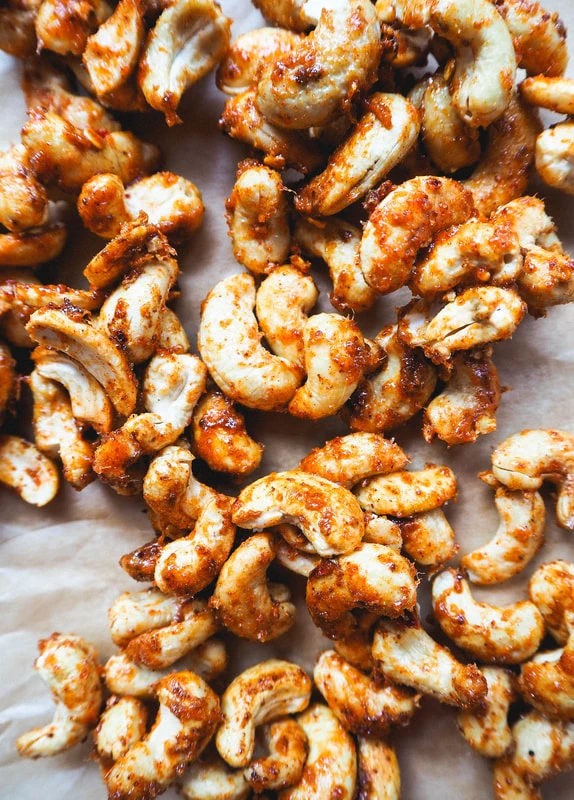 The Source Bulk Foods here in the UK (one of my favourite stores, I might add) have these chilli cashews that are simply to-die-for! They're not too spicy with a hint of sweetness and obviously salty. Despite Source's chilli cashew ingredients not being that bad, I'm however cracking down on my refined sugar consumption within my diet. I am no means against refined sugar as it does have a time and place - especially when you need a quick energy boost before/ during a performance, or even during our daily rigorous schedules. But for me, (I'm sure some of you can relate) processed sugar can have a negative effect on our bodies - like bloating & blemished skin. With that being said, I do love their chilli cashews and thought, "why miss out when I can recreate them at home?" ~ In my recipe I've chosen to use maple syrup. Yes maple syrup is still a form of sugar, but in comparison to white sugar it's collected from a whole natural source, provides vitamins & minerals and Low GI, meaning slow energy release. Maple syrup also adds a wonderful flavour to the cashews that I think is rather sensational. Enjoy! Love Alex, Ballerina Bites. Xx PS: Be sure to tag me on Instagram so I can see your wonderful recreations.  Ingredients
1 cup raw cashew nuts 1 ½ tbsp maple syrup 1 tsp corn flour ½ tsp salt ½ tsp garlic powder ½ tsp onion powder ¼ tsp smoked paprika ¼ tsp cayenne pepper ⅛ tsp sumac (adds a lemony flavour) ¼ tsp chilli flakes Method In a fry-pan add the cashew nuts and set heat to medium. Allow the nuts to toast, (stirring throughout) until they begin to colour. Keep an eye on them as they tend to burn quite quickly. Mine took around 10 minutes. Meanwhile in a small bowl add the spices. Stir and set aside until needed. Once the nuts are golden, add the maple syrup and spice mix. Stir, making sure everything is coated (I used a spatula) and toast for a further 1- 2mins. Spread the cashews out onto a lined surface; allow the nuts to cool before enjoying. Store in an airtight container at room temperature. Yields x1 500ml jar Of late I've been inspired by Indian cuisine after watching Pryia from creating mouth watering dishes on BA's Youtube channel. With Pryia's ingrained-since-birth knowledge and her use of language, she makes Indian cooking somewhat more approachable and why I've decided to create more traditional Indian dishes at home. 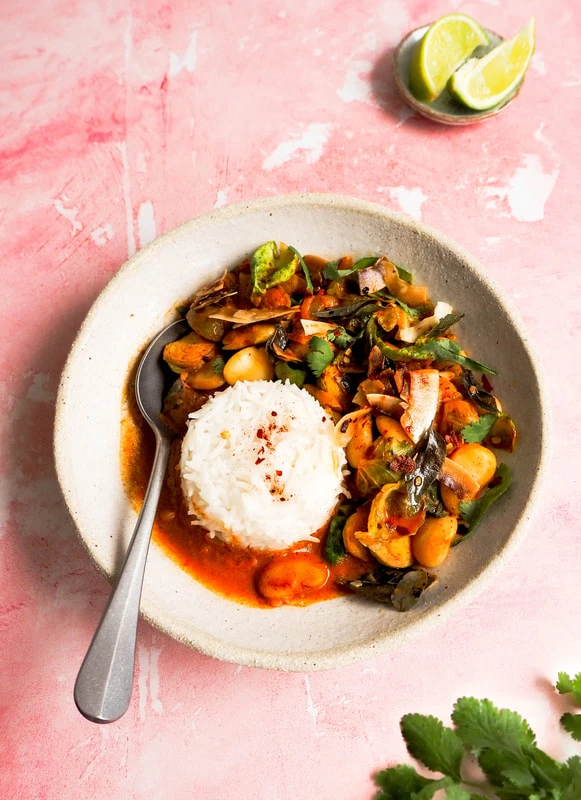 Here I have my version of Tikka Masala and although I've just mentioned "traditional," I've still managed to bend the rules. In my recipe I've used Brussel sprouts and butter beans as the 'bulking ingredients' in this dish, as they create a meaty heartiness; I simply love each to their own. If you're sceptical about the Brussel sprouts, don't be. They carry the curry sauce with such purpose with each crevice managing to be coated in the luscious sauce. On a more traditional side of things, I've used an array of ground spices and trusty curry powder, to really bump up the flavour. Something I love about Indian cooking, is they're not afraid to use ingredients such as spices quite intensely - bringing optimum favour even to the most simple of dishes. I've even managed to pike the dish with asafoetida! Asafoetida is used in many savoury dishes throughout India - mimicking onion, garlic, egg and even meat. It's commonly used in vegetarian dishes to add a bold depth of flavour. If you can find asafoetida, I highly recommend you give it a try, but be weary it doesn't have a pleasant smell. ;) Another widely used technique is 'chonk' - where you temper herbs & spices in oil to enhance their flavour and compliment the dish at hand. It's also wonderful at adding texture to a dish. Enjoy! Love Alex, Ballerina Bites. Xx PS: Be sure to tag me on Instagram so I can see your wonderful recreations! 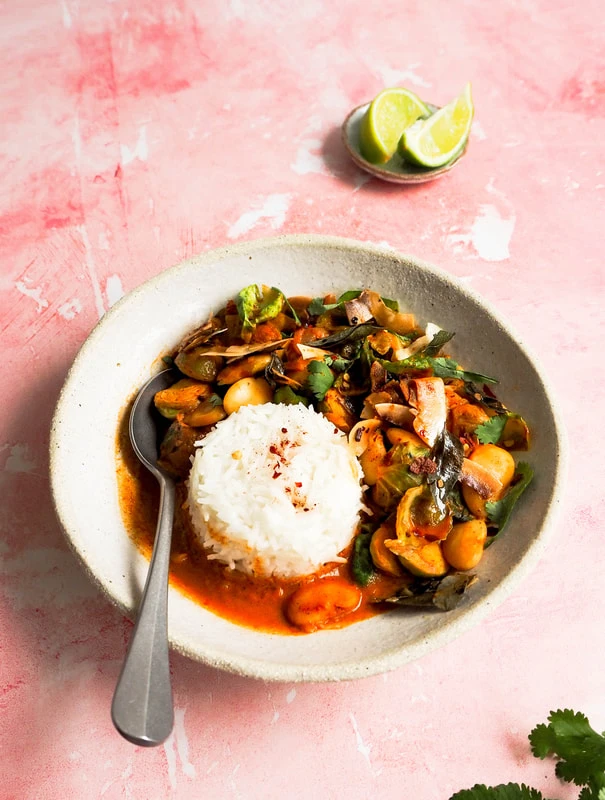 Ingredients
1 medium onion 2 garlic cloves, crushed 1 tbsp mild curry powder 1 tbsp smoked paprika ½ tsp garam masala ¼ - ½ tsp cayenne pepper ⅛ tsp asafoetida (I managed to find it at The Source Bulk Foods) 3 tbsp tomato paste 2 bay leaves 1x 400ml can coconut milk ½ can (200ml) water 400g Brussel sprouts, sliced in half 2 cans butter beans, drained and rinsed A handful of coriander, roughly chopped Wedges of lemon or tangy yoghurt to serve Chonk 3 tbsp coconut oil ⅓ cup dried curry leaves ⅓ cup coconut flakes ½ tsp chilli flakes Season with salt Method In a large saucepan, add a dash of water or oil. Set heat to medium- high. Slice the onion into thin half moon strips and add to the pan; stirring occasionally. Once the onion begins to go translucent, stir in the crushed garlic, curry powder, smoked paprika, cayenne pepper, asafoetida and tomato paste. Allow the spices to toast until they become fragrant - about 2mins. If you feel your pan becoming too dry, add a dash of water to deglaze the pan. Now add the bay leaves, coconut milk, water, Brussel sprouts & butter beans. Stir so everything is nicely amalgamated. Bring to a boil, before covering with a lid ajar and setting heat to low. Allow to simmer for 45mins, Meanwhile make the 'chonk' by adding all chonk ingredients into a small saucepan. Set heat to medium and allow to cook until the coconut chips begin to turn lightly golden. Be sure to take the chonk off heat a minute early, as it will continue to cook. Transfer to a bowl to stop the cooking process. Once the curry is ready - serve over rice with a sprinkle of the chonk. To freshen the dish, scatter over fresh coriander and a squeeze of lime juice or a dollop of tangy yoghurt. Serves 4-6 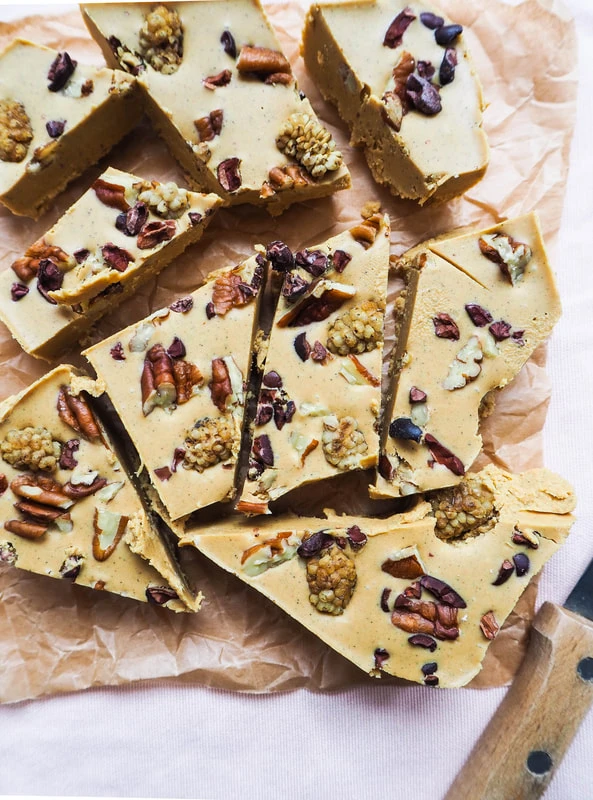 Whether you're a dancer like myself or a keen gym goer, your protein intake is something to be conscious about. We need protein to help preserve & build muscle! Luckily Vega's protein powder tastes delicious and it's not too hard to add a serving to my smoothies and alike. However incorporating protein powder into recipes can be a challenge, as often it makes things too dense and grainy. Thankfully though I've tackled this for you, and already I've successfully created two recipes using their protein- Lemon & Poppy Seed Muffins & Cookie Dough Protein Balls. ~ 'Power Up Chocolate' A homemade chocolate with only four ingredients- vanilla protein powder, peanut butter, cacao butter & sea salt. This chocolate can be enjoyed as a light pre-show snack for my dancer friends, or the perfect after dinner treat. Enjoy! Love Alex, Ballerina Bites. Xx PS: Be sure to tag me on Instagram so I can see your wonderful recreations. 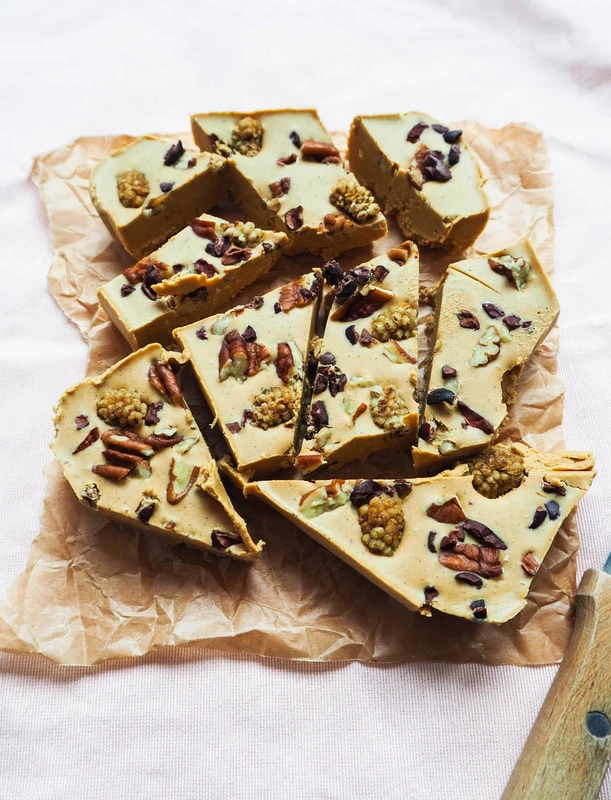 Ingredients
1 scoop Vega’s Clean vanilla protein powder 2 tbsp Pic’s smooth peanut butter 25g cacao butter Pinch of salt Toppings I like mulberries, pecans & cacao nibs, but feel free to choose your own. Method In a small saucepan add the above ingredients, expect toppings. Gently heat & melt the ingredients until combined and smooth. Pour chocolate into a small lined container or tray and top with the toppings listed above or your desired. Allow to set in the refrigerator for at least an hour, before sporadically chopping with a knife. 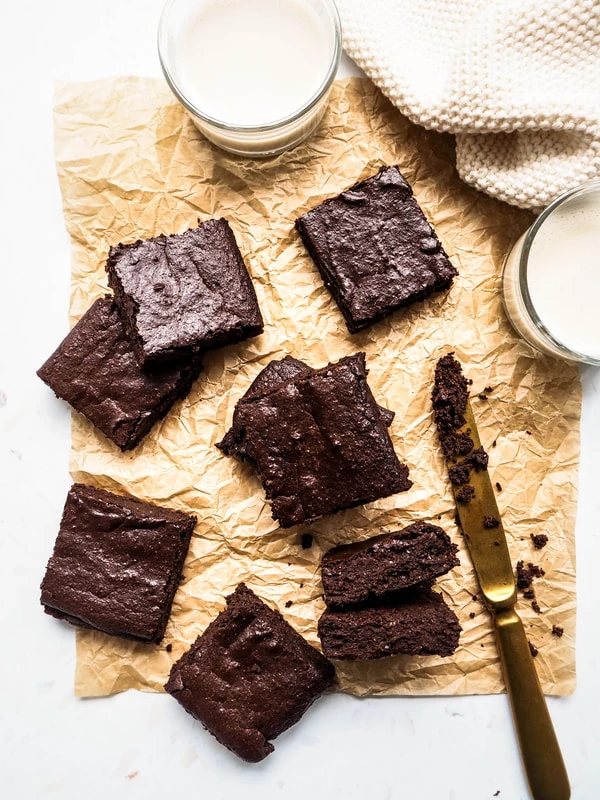 If you Google vegan brownies a plethora of recipes will pop up. I'm positive that 99% of these recipes will lean towards being highly processed or extremely healthy; made with 'bleached' ingredients (white flour, sugar & vegan butter) or uses black beans, sweet potato, dates or nuts. These variations do have a time and place, but I wanted to create a brownie that tastes and looks like true brownie (made with butter & eggs), however made without the use of refined ingredients. "A brownie should have a dense, but moist fudgy centre and a glossy top." How on earth am I going to do that? 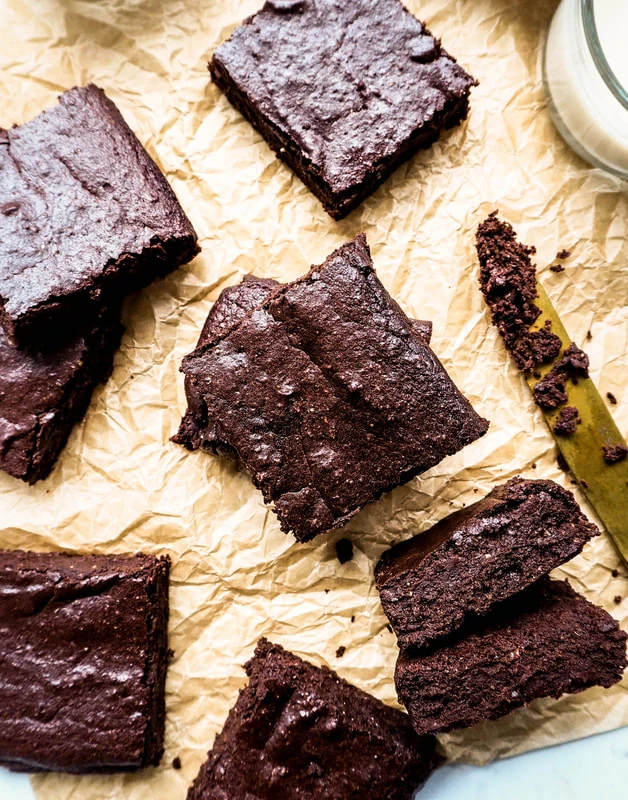 Attempt #1 After doing some research online, I've developed a recipe that I thought was set for success.
The result of this bake wasn't too crash hot and most of it ended up in the compost bin. Despite nailing the ingredient swaps, that ratio of ingredients were simply off.
Attempt #2 Goals for this batch:
This batch actually turned out pretty good, with nice flavour and definitely satisfying a brownie craving. I could stop here... but, this recipe was missing the rise and fall of a classic brownie top. I want that crisp top! Attempt #4 See recipe below. :) 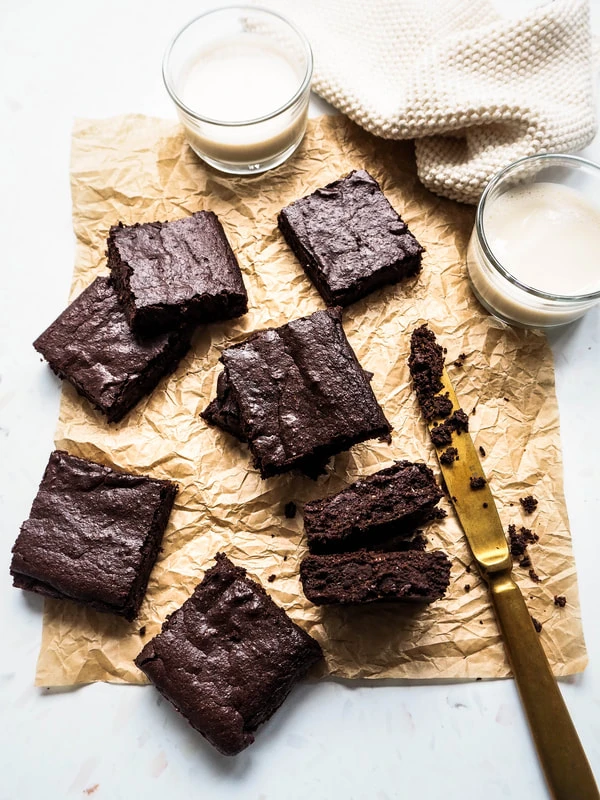 Ingredients
200g 70% dark chocolate 2 tbsp (12g) cacao powder 1 tsp (2g) instant coffee ½ tsp salt ½ cup (125g) apple puree 1 tsp (6g) vanilla extract ½ cup (75g) coconut sugar ½ cup (120g) aquafaba (chickpea water) ½ cup (80g) wholemeal rye flour (or flour of choice) 1 tsp baking powder Method Preheat the oven to 190°c and line a 20cm square brownie tin with baking paper. Add chocolate, cacao powder, instant coffee, salt, apple puree and vanilla in a medium sized saucepan. Set heat to low and gently warm until the chocolate has melted and combined with the other ingredients. In a bowl add the coconut sugar and aquafaba. Using an electric beater, beat mixture until it looks like maple syrup and the sugar crystals have dissolved. Pour syrup into the melted chocolate mix and stir until well incorporated. In a separate bowl, add rye flour and baking powder. Stir to remove any lumps using a whisk. Add flour to the chocolate batter and fold until just combined. Pour brownie batter into your prepared tin and bake for 15mins. (The brownie will continue to set once out of the oven.) Allow to cool slightly in the tin before continuing to cool on a wire rack. Once the brownies are cool, they're then ready to cut. Store in an airtight container in the refrigerator for up to a week. Makes 9 brownies 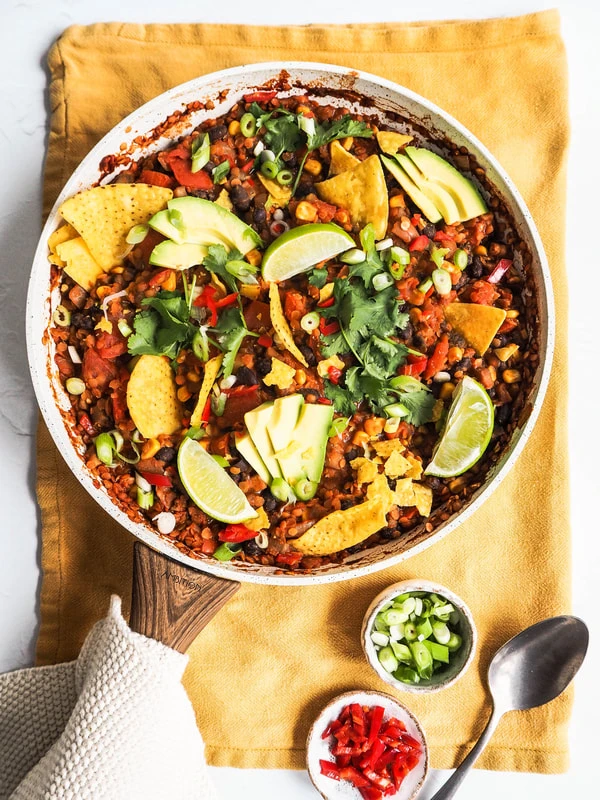 Chilaquiles is a Mexican dish with fried corn chips, spicy salsa and cheese. I may have taken the definition of this dish rather lightly, but mine does involve corn chips, a spicy red tomato sauce and nutritional yeast (the cheese sub). If I do say so myself, my version of Chilaquiles is finger licking amazing, and I've come to realise just how much I appreciate Mexican cuisine; they've nailed bringing different flavours & textures to create dishes with incredible flavour sensations! ~ by.Chloe here in London actually do a similar menu item and I absolutely love it! After eating their Taco Salad I always feel refreshed & light and makes me question, “why haven't I already recreated this at home?!” Perhaps I felt it was too complicated; there is a lengthy ingredient list, but when you think about it, most of the components need a simple chop before a rustic gathering on a plate. See for yourself. Enjoy! Love Alex, Ballerina Bites. Xx PS: Be sure to tag me on Instagram so I can see your wonderful recreations! 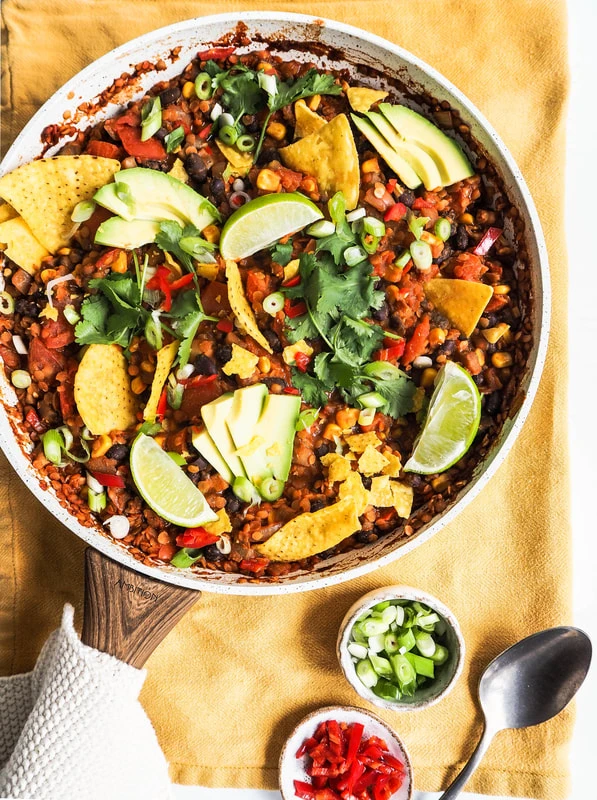 Ingredients
1 medium brown/red onion, diced 2 garlic cloves, peeled and crushed 300g button mushrooms, chopped into small cubes 1 red capsicum, sliced and cubed 1 red chilli, finely chopped (seeds removed if you wish) 3 tbsp tomato paste 1 tbsp tamari 2-heaped tbsp smoked paprika 1 tbsp ground cumin ¼ - ½ tsp chilli powder (optional) 1 tsp coconut sugar 2 medium plum tomatoes, roughly chopped into cubes 1 cup red lentils, rinsed 3 tbsp nutritional yeast 1 can black beans, drained & rinsed ½ cup frozen corn, thawed To serve Corn Chips Iceberg lettuce, shredded Coriander, roughly chopped Tangy dairy free yoghurt Avocado slices Fresh red chilli, thinly sliced Spring onion. thinly sliced Wedges of lime Method In a large fry pan or saucepan add a dash of water or oil. Set heat to medium and add the onion, garlic, mushrooms, capsicum and season to taste. Sauté until the onion is translucent and the mushroom juices have evaporated. Stir in the red chilli, tomato paste, tamari, smoked paprika, ground cumin, chilli powder (if using) and toast for 2 minutes or until fragrant. Now add the coconut sugar, tomatoes, red lentils and 2 cups of water. Bring to a boil, set heat to medium- low and cover partially; stir throughout. Once the lentils have absorbed most of the liquid, stir in the nutritional yeast, black beans, corn and season to taste once more. Allow the beans & corn to warm through before serving. To serve, lay a bed of shredded lettuce followed by a handful of corn chips, the lentil & black bean chilli, a dollop of yoghurt and avocado slices. Garnish the dish with fresh coriander, spring onion and more fresh chilli if you wish. Before eating spirits over a wedge of lime. Serves 6- 8 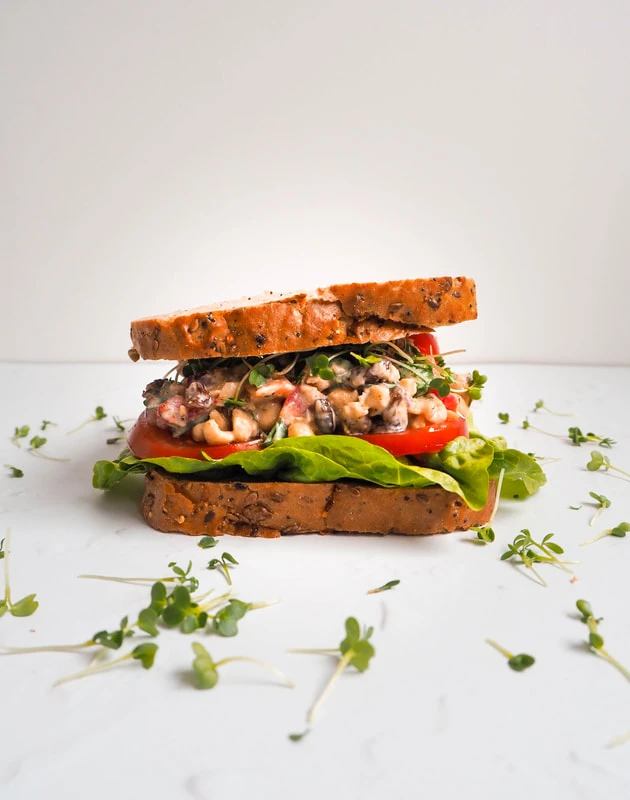 Growing up, school lunches always involved a sandwich with a classic Aussie flavour combination- ham & cheese, Vegemite, peanut butter & chicken, lettuce & mayo. Since becoming plant-based, sandwiches became somewhat of a bore as the veggie option always seemed to be hummus with veg. Don't get me wrong I don't mind a hummus sandwich or even a Vegemite/ peanut butter one for that matter, but I was just craving something different, unexpected. ~ Please meet my Curried Chickpeas; chickpeas adorned with curry spice, coconut & crisp veg. Yes! Despite looking like an extra hour has been added to your meal-prep, this recipe is a breeze with you draining, chopping and mixing in a matter of minutes. The recipe below will make three serves and keeps well in the fridge, if not gets better as it sits. Feel free to double the recipe to ensure enough supply for the whole week. Enjoy! Love Alex, Ballerina Bites. Xx PS: Be sure to tag me @ballerina_bites on Instagram so I can see your recreations! Ingredients
1 can chickpeas, drained and rinsed 125g unsweetened coconut yoghurt 1/2 a small red onion, thinly sliced & diced 1/2 red capsicum, thinly sliced & diced Juice of 1/4 lemon A small handful of coriander or parsley, roughly chopped 2 tbsp sultanas/ raisins 1 tbsp curry powder 1 tsp seeded mustard 1 tsp maple syrup 1/2 tsp garlic powder (optional) 1/2 tsp chilli flakes (optional) Salt and pepper to taste Bread of choice Salad of choice Method In a large bowl add the chickpeas and mash with a potato masher or fork, leaving some texture. Add yoghurt, red onion, capsicum, lemon, coriander/ parsley, sultanas, curry powder, dijon mustard, maple syrup, garlic powder, chilli flakes, salt & pepper and stir until well combined. Dollop and spread a generous amount of the curried chickpeas over a slice of bread. Top with your salad of choice then cap with another slice of bread. Enjoy sandwich as is or also try toasted. Store leftover chickpeas in an airtight container in the refrigerator. Serves 3 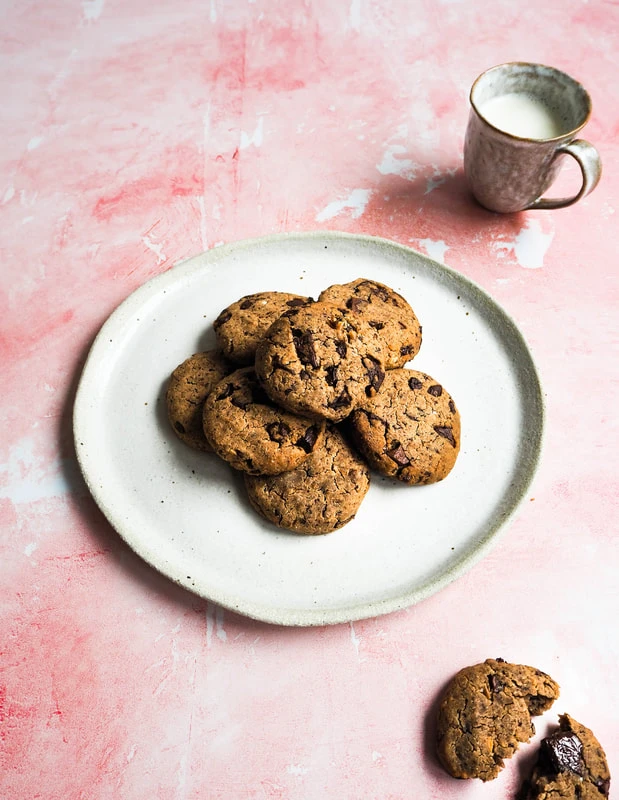 When I first developed this recipe I used chickpeas as the binder to replicate a baked version of my Cookie Dough Protein Balls, which also used the legume. On my third recipe test I accidentally picked up pinto beans and decided to run with it and see how the recipe would go. To my surprise, the recipe actually worked and tasted if not better than the original. ~ This recipe isn't going to win any awards for the perfect Choc-Chip Cookie, but is a rather delicious sweet something to be enjoyed any time of the day. With the other ingredients combined, this recipe is fabulously high in protein in comparison to a standard cookie with the pinto beans, buckwheat flour & peanut butter adding the protein boost. Why not make this cookie your pre/ post workout snack?! Enjoy! Love Alex, Ballerina Bites. Xx PS: Be sure to tag me on Instagram so I can see your wonderful recreations! 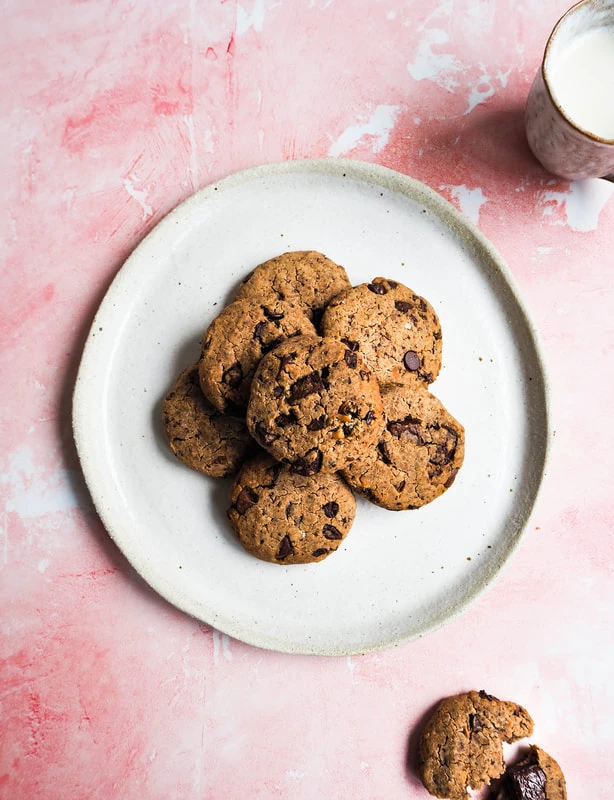 Is it a soft baked, crispy or chewy cookie? Soft baked. I'm sure if you prefer a crispy cookie, then you can bake at a lower temp for longer. This cookie isn't going to reach 'chewy' because of it's low fat and sugar content, but regardless I have a cookie with a thin crispy outer shell and a soft cookie dough like centre. The cookies are tastiest on the day of bake, as they tend to lose their crispy outer shell. 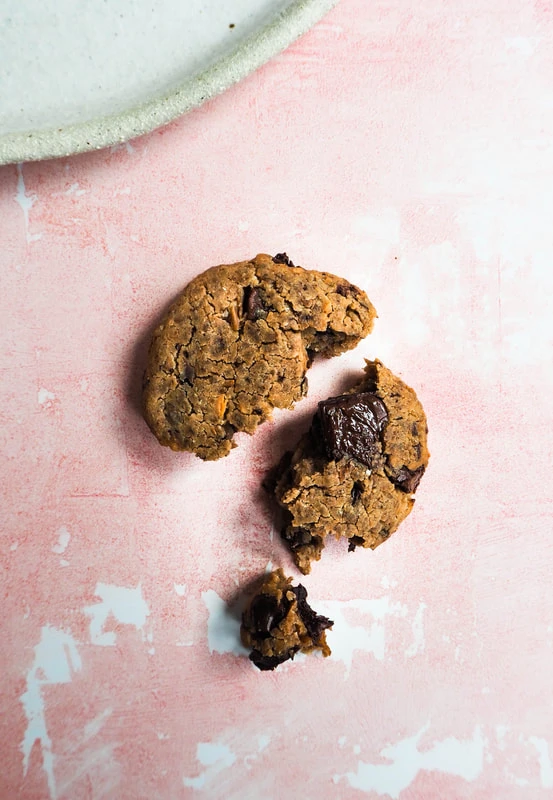 Can I use another bean other than pinto? Yes of course! The bean I happened to pick up was pinto. Choose your favourite bean or legume. :) 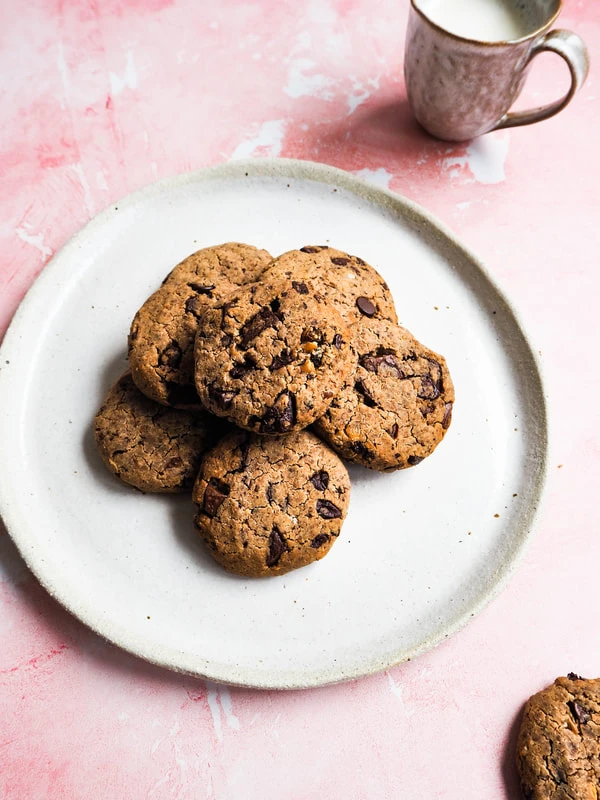 Ingredients
1 can pinto beans or any other similar bean ¼ cup (40g) buckwheat flour 3 tbsp (35g) coconut sugar 1 tsp linseed meal 1 tsp baking powder 2 heaping tbsp peanut butter (preferably salted) or nut/ seed butter of choice 2 tbsp coconut oil, melted 1/2 tsp vanilla extract 1/8 tsp sea salt (add if chickpeas aren’t salted) 100g dairy free 70% or greater dark chocolate, roughly chopped into small pieces Method Preheat the oven to 160°C and line a tray with baking paper. Drain and rinse beans then transfer to a food processor. Add buckwheat flour, coconut sugar, linseed meal, baking powder, peanut butter, vanilla, salt (if using) and process until a very smooth dough is formed. If you see the dough struggling to come together, add a tbsp of water. Transfer dough into a bowl and stir in the chopped chocolate. Using a cookie scoop, scoop dough into balls. Lightly flatten and place on your baking tray. Bake for 15- 20mins or until golden brown. Allow cookies to cool on a wire rack before enjoying. Store in an airtight container at room temperature for up to 5 days. Makes 9 Cookies 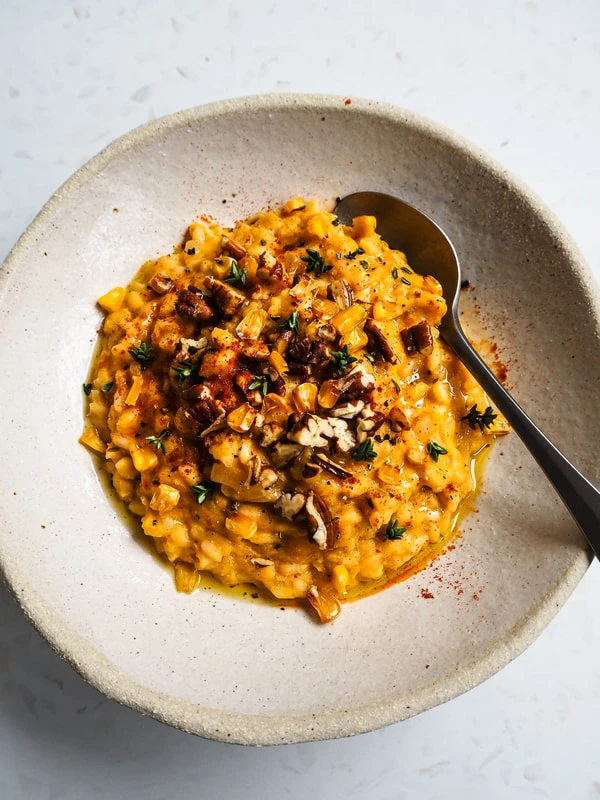 Yippee there's a new addition to B.B, a new camera! The I took last year were taken on my phone, Hauwei Mate 20 Pro. Before this I'd been using a Nikon DSLR camera that I really didn't enjoy using, just too bulky! This is why I moved to a phone that I knew was praised for it's high quality camera and pro settings. My Hauwei served me well last year, but the images the phone created were missing something. For Christmas I asked for a compact camera, the Olympus Pen E-PL9 to hopefully create what I'm looking for. So far I love it! It looks absolutely gorgeous and it has some pretty unexpected smart functions. TBC… 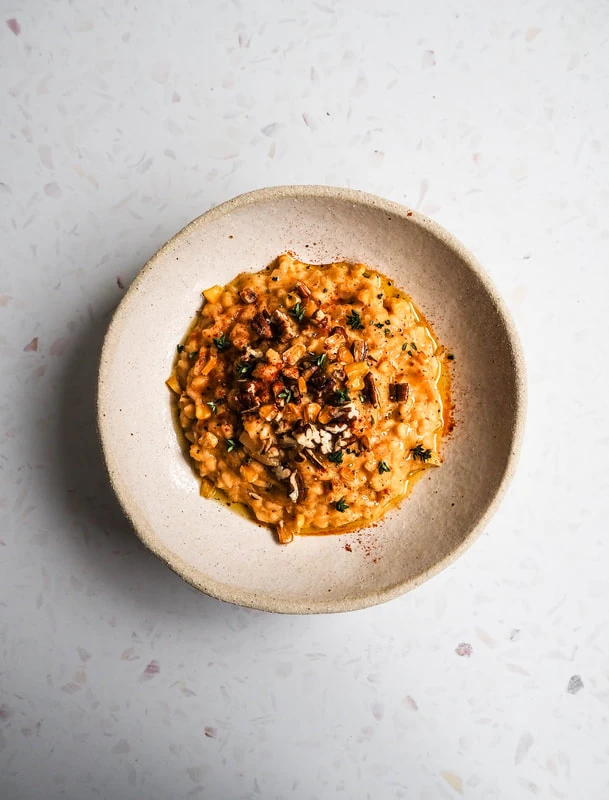 My Southern Style Corn Risotto is the first recipe to be taken using my Olympus Pen. I'm sure you can see the difference! A New Year's goals of mine is to find my style, how the image is being produced & edited. I take inspiration from many incredible food photographers, such as Top with Cinnamon & Golubka Kitchen, and I hope by the end of 2020 I too create some stunning shots. 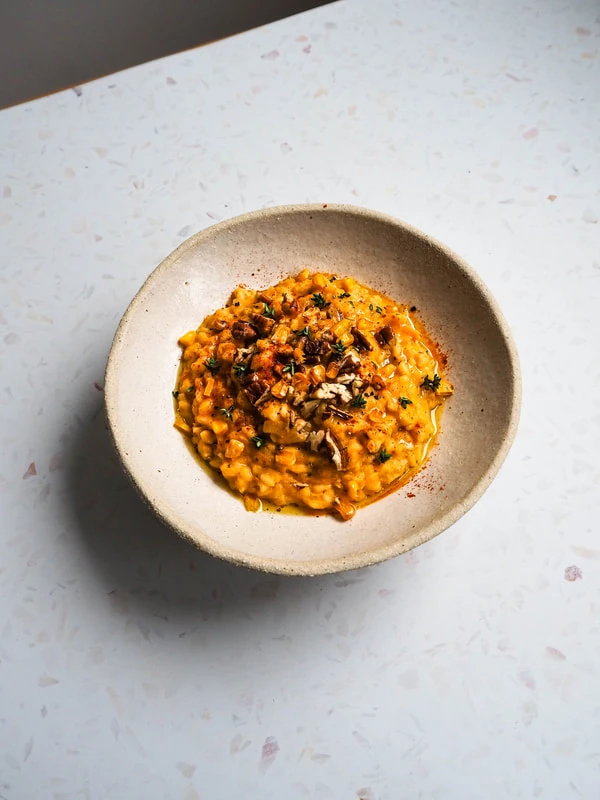 Moving onto the recipe. I'm sure you've realised that here I have dam delicious risotto! A lot of vegan risotto's use tahini, cashews, plant-based mylk's or dairy free cheeses to create the creamy element found in many traditional risotto recipes, however in mine I've used corn, yes corn! I really stumbled on this method of cooking when I wanted to create a dish using the southern flavours of South America. Southern food is hard to pinpoint with influences coming from France, China, Italy and Mexico, due to its diverse history. There is really no set of rules when it comes to their cooking, with the countries known ingredients overlapping in many dishes. To make my risotto creamy, I blend corn kernels with a bay leaf & celery infused corn cob stock, which ultimately produces a mylk and perfect in making things ultra creamy. This dish tastes delightful and perfect when you're craving something indulgent and comforting. I think this one is dinner party worthy too! Enjoy! Love Alex, Ballerina Bites. Xx PS: Be sure to tag me at on Instagram so I can your wonderful recreations! 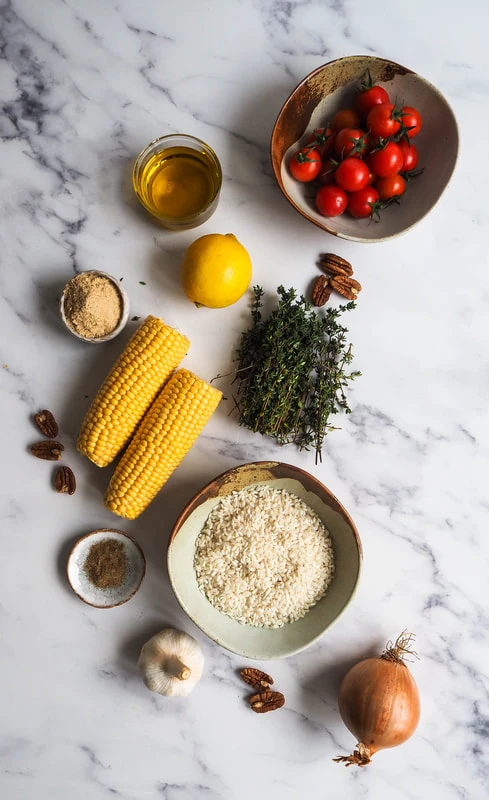 Ingredients Olive Oil 1 medium onion, finely diced 2 garlic cloves, crushed 1 tsp smoked paprika ½ tsp celery salt 1 cup arborio rice 6 sprigs of fresh thyme ½ cup frozen corn kernels ⅓ cup raw pecan nuts Stock 3 cups water 2 corn cobs 1 celery stick, chopped into three 3 bay leaves A generous pinch of salt Juice of 1/2 a lemon (optional) 1/3 cup nutritional yeast (optional) Method Preheat your oven to 180°c and scatter frozen corn kernels over a large lined tray. Create space for your pecan nuts and pop tray into the oven. Roast nuts for 5-7mins until toasted (keep an eye on them!) and once golden transfer to a plate. Roughly chop nuts and set aside. Allow the corn to continue cooking until golden and slightly charred. To make the stock, carefully remove the corn kernels from the cobs and set aside in a bowl. Add water, corn cobs, celery, bay leaves and sea salt to a medium size saucepan. Bring to a boil, before reducing heat to low and covering. Meanwhile in a large saucepan add a glug of oil and set heat to medium. Add onion and sauté until translucent. Stir in the garlic, paprika, celery salt, rice and a crack of black pepper. Allow to toast, stirring throughout until the rice begins to change colour, from white to opaque. Now add in the thyme. Remove the corn cobs and bay leaves from the stock. Transfer stock & celery to a blender along with the fresh corn kernels you set aside before. Blend until smooth. In 1/2- 1 cup stages, stir in the corn stock allowing the previous liquid to be absorbed by the rice before adding more. Repeat the process, stirring throughout until no corn stock remains. Taste some rice to see if it’s cooked through, if you feel like it’s hard add boiling water in small stages until softened, Finally stir in the lemon juice, nutritional yeast (if using) and more salt and pepper if needed. Remove the thyme sprigs, before serving risotto between three bowls Top each risotto with a scatter of the roasted corn & pecans, thyme leaves and a drizzle of olive or truffle oil. Serves 3 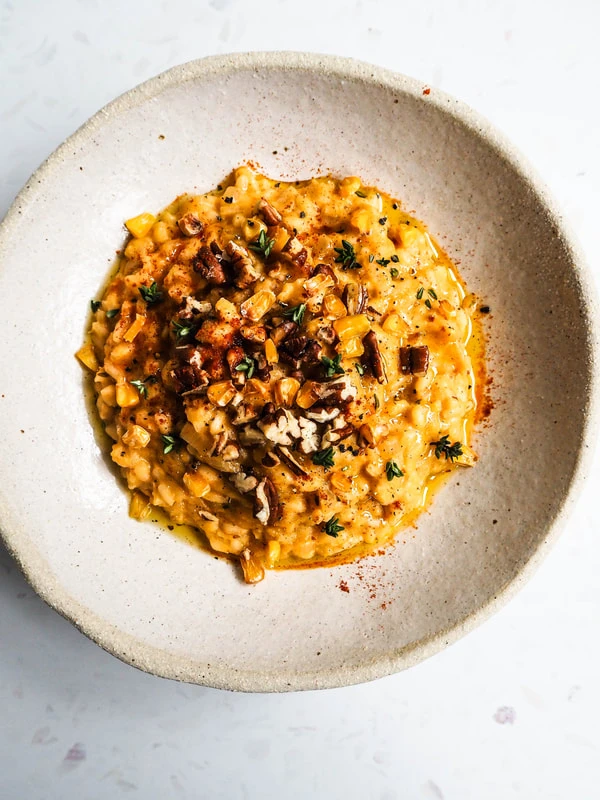 |
AuthorI'm passionate Ballerina that is dedicated to living a healthy lifestyle to ensure I perform at my best. 
|
